Lesson Four... Text Ready!
Are you ready? Time to take the small pieces we have learned and discover how to format them into a fully functional page.
Here is where we will show you some simple text tools of formatting and aligning.
You’ll see how you can put your image where you want on the page as well as text.
We will give you three versions.
 Straight down center format Straight down center format
 Staggered text and image format Staggered text and image format
Image and text on side by side format
Creating a fine looking page can be as simple as a font color or size of text to set your page off.
This basic tool is a foundation for text. We’d like now to place our title on our page for all to see.
This is done with the < H1 > we told you about earlier. This means header and size.
1 being the largest. You can also make it smaller as in < H4 >.
|
|
|
This is set with the default text from the top of our html document. So you want to change it? We’ll try… Simple!
Here is the code: < font color=” “ font face=” “ >
Color for text < font color="purple" >
Font for text < font face="edda" >
Size for font < font size=”4 “ >
|

You may use any font you like just type it in the code, < font face=” “ >
Some fonts are not used by all computers so start with a simple font. Your font size < font size=” “ >
will be put where you want to change size. The same as for the < font color=” “ >
Just change them when and where ever you wish. Note! These fonts must be closed following use where you want the tag.
If it is not close the change will follow the entire page. Please close your work!
Straight down center format
Now you may use our first center tag.
Formatting text:
Center < center > < /center >
Paragraph < p >
Line brake < b r>
Paragraph left < p align=”left” >
Paragraph right < p align=”right” >
|
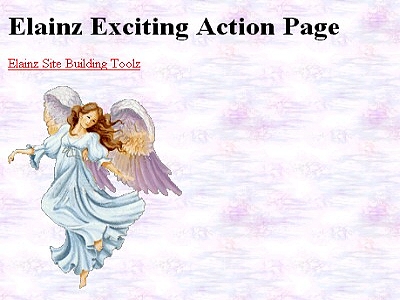
Any time you like we will show you how the text will view on our page. This shows center!
See how the text is centered on the page?
< p > < img src="angeld-st_r.gif" width="150" height="144" alt="" border="0" >
On this page you will find all the text and images centered on the page.
This is a quick way to make a page by puting images and then text.
< a href="http: //DEZART.itgo.com" >Elainz Site Building Toolz< /a >
< p >
Here you can click on the images to go to the web sites.
< a href="http: //www.angelfire.com/in2/angelz" >
< img src="angels0033.gif" width="200" height="251" alt="Elainz Angelz" border="0" > < /a > < p >
< font face="edda" > < font color="purple" > < font size="+2" >Elainz Angelz< p >
< a href="http: //www.dezart.freeservers.com/" >
< img src="cfangel111.jpg" width="134" height="239" alt="Dezart Impressionz Home Page" border="3" > < /a > < p >
Dezart Impressionz< /font >
< /center >
< /body >
< /html >
Notice that the center tag opens at the start of the text and ends at the end of the body.
This will hold all text and images centered the document.
This is the quick and easy way to format your web page.
With just a scroll all your text and images will be on your page. The < p > paragraph tag is the one to use here.
This will send each image and each text into spaced fields one under the other.
If you want them on the same line just don’t put the < p >.
Remember that word wrap is always in affect and you will have to view your page to see if this is how you wish the page to look.
|

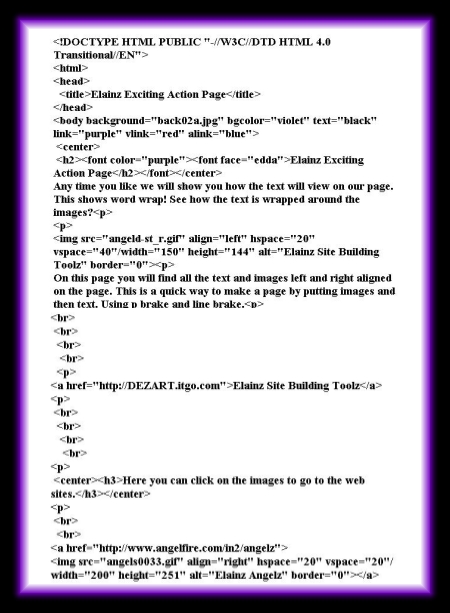
Staggered text and image format
This page will make word wrapping around text. We have used here the simplest test we could find.
By using the code:
vspace=”40”/
hspace=”20”/
The vspace and hspace is by far the simplest way to wrap text.
The perimeters on the vspace and hspace are just designating how far to space pixels between image, from side or top.
This is spacing your text around an image. To have the image and text seem to be on the same line. Page Right and Left.
This is a hard thing to have work. We have spent long hours finding this out. Along with this code we have used < p > and < br >
to off set our text and image so they seem to align next to each other.
Try this code, you’ll see what a difference it can make. This one is easy.
You will have to look and look at your html until you have the right spacing desired. Go head and try this one.
|

Image and text on side by side format
This is the finale! The best for last! The hardest task to learn. But made here with clear description and understanding.
We’ll make this a painless process of learning html. By far this can be the best of your web page.
Are you ready to take your final lesson to text and image format? Here is your answer… Tables!
The information you can put into a table can greatly enhance the look of your page. Don’t get worried.
A simple table can be quickly made with just two or three tags.
We gave this page a fun test and with a simple < tr > and < td > a table is made.
A < tr > is a tag marking the beginning of each new row in a table.
The < td > tag marks the cell within a row.
So in a basic table you will find these tags.
< table >
< tr >
< td >
< /td >
< /tr >
< /table >
Sounds simple enough. We will show you three ways to use this tag. Then you can go try your hand and learn all you can!
You start with the table tag, this will open your table. The tr will set your table row. Then place what td’s you wish in your table.
This may look like this:
< table >
< tr >
< td > welcome< /td >
< td >See you later< /td >
< td > come back< /td >
< /tr >
< /table >
This table gives you one row with three text boxes. What some more rows?
< table >
< tr >
< td > Welcome< /td >
< td >See you later< /td >
< td >Come back< /td >
< /tr >
< tr >
< td >You came back< /td >
< td >Nice to see you< /td >
< td >More coming soon< /td >
< /tr >
< tr >
< td >You want to learn< /td >
< td >You can try< /td >
< td > Just try it!< /td >
< /tr >
< /table >
Ok there you have three messages, three rows, and three columns. Hope your getting this.
Just try copy paste that table to test it. You can try this in Microsoft word too.
Here is our first table on our page for you to show you what can be done with these tags.
This test is a viewed table with borders. You remember us telling you about borders?
Well here is where you really can have fun with them. We colored the table as well.
|
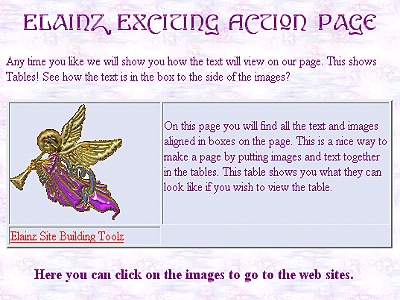
Any time you like we will show you how the text will view on our page. This shows Tables!
See how the text is in the box to the side of the images?
< table border="2" bgcolor="lavender" >
< tr >
< td width="200" hight="50" >
< img src="angeld-st_r.gif" width="150" height="144" alt="Elainz Site Building Toolz" border="0" >
< /td >
< td >
< font color="purple" >
On this page you will find all the text and images aligned in boxes on the page.
This is a nice way to make a page by putting images and text together in the tables.
This table shows you what they can look like if you wish to view the table.
< /td >
< /tr >
< p >
< tr >
< td >
< a href="http://DEZART.itgo.com">Elainz Site Building Toolz< /a >
< /td >
< /tr >
< /table >
This tag will set the color for the table. Try your color and border size.
< table border="2" bgcolor="lavender" >
We used a width and height to our table to enhance the optimal features for the image and text.
These features you can change to suit your table. Try testing different sizes.
Then again you really don’t have to put sizes in the table.
Just a tr and td can do a nice job.
< td width="200" hight="50" >
This was a test to place a one-line header where we wanted it to go, in between the tables.
So we put this tag in a table too. The < th > tag is a header tag and shows up as a text header
displaying the text as bold on your page. This works the same way as the < td > tag.
< table >
< tr >
< th width="500" height="30" align="center" >
< center > < h3 > < font color="purple" >Here you can click on the images to go to the web sites.< /h3 >
< /center >< br >
These last two tables do not have borders.
< /th >
< /tr >
< /table >
These tables are very simple showing no border and no size. The simple tr and td is all that is needed.
This was the image < a href = >and the text title for the link.
< table >
< tr >
< td >
< a href="http://www.angelfire.com/in2/angelz" >
< img src="angels0033.gif" width="200" height="251" alt="Elainz Angelz" border="0" >< /a >
< /td >
< td >
< font face="edda" font color="purple" font size="+2" >Elainz Angelz
< /td >
< /tr >
< p >
< tr >
< td > < font face="edda" font color="purple" font size="+2" >
Dezart Impressionz< /font >
< /td >
< td >
< a href="http://www.dezart.freeservers.com/" >
< img src="cfangel111.jpg" width="134" height="239" alt="Dezart Impressionz Home Page" border="3" > < /a >
< /td >
< /tr >
< /table >
< /body >
< /html >
 |
   

|